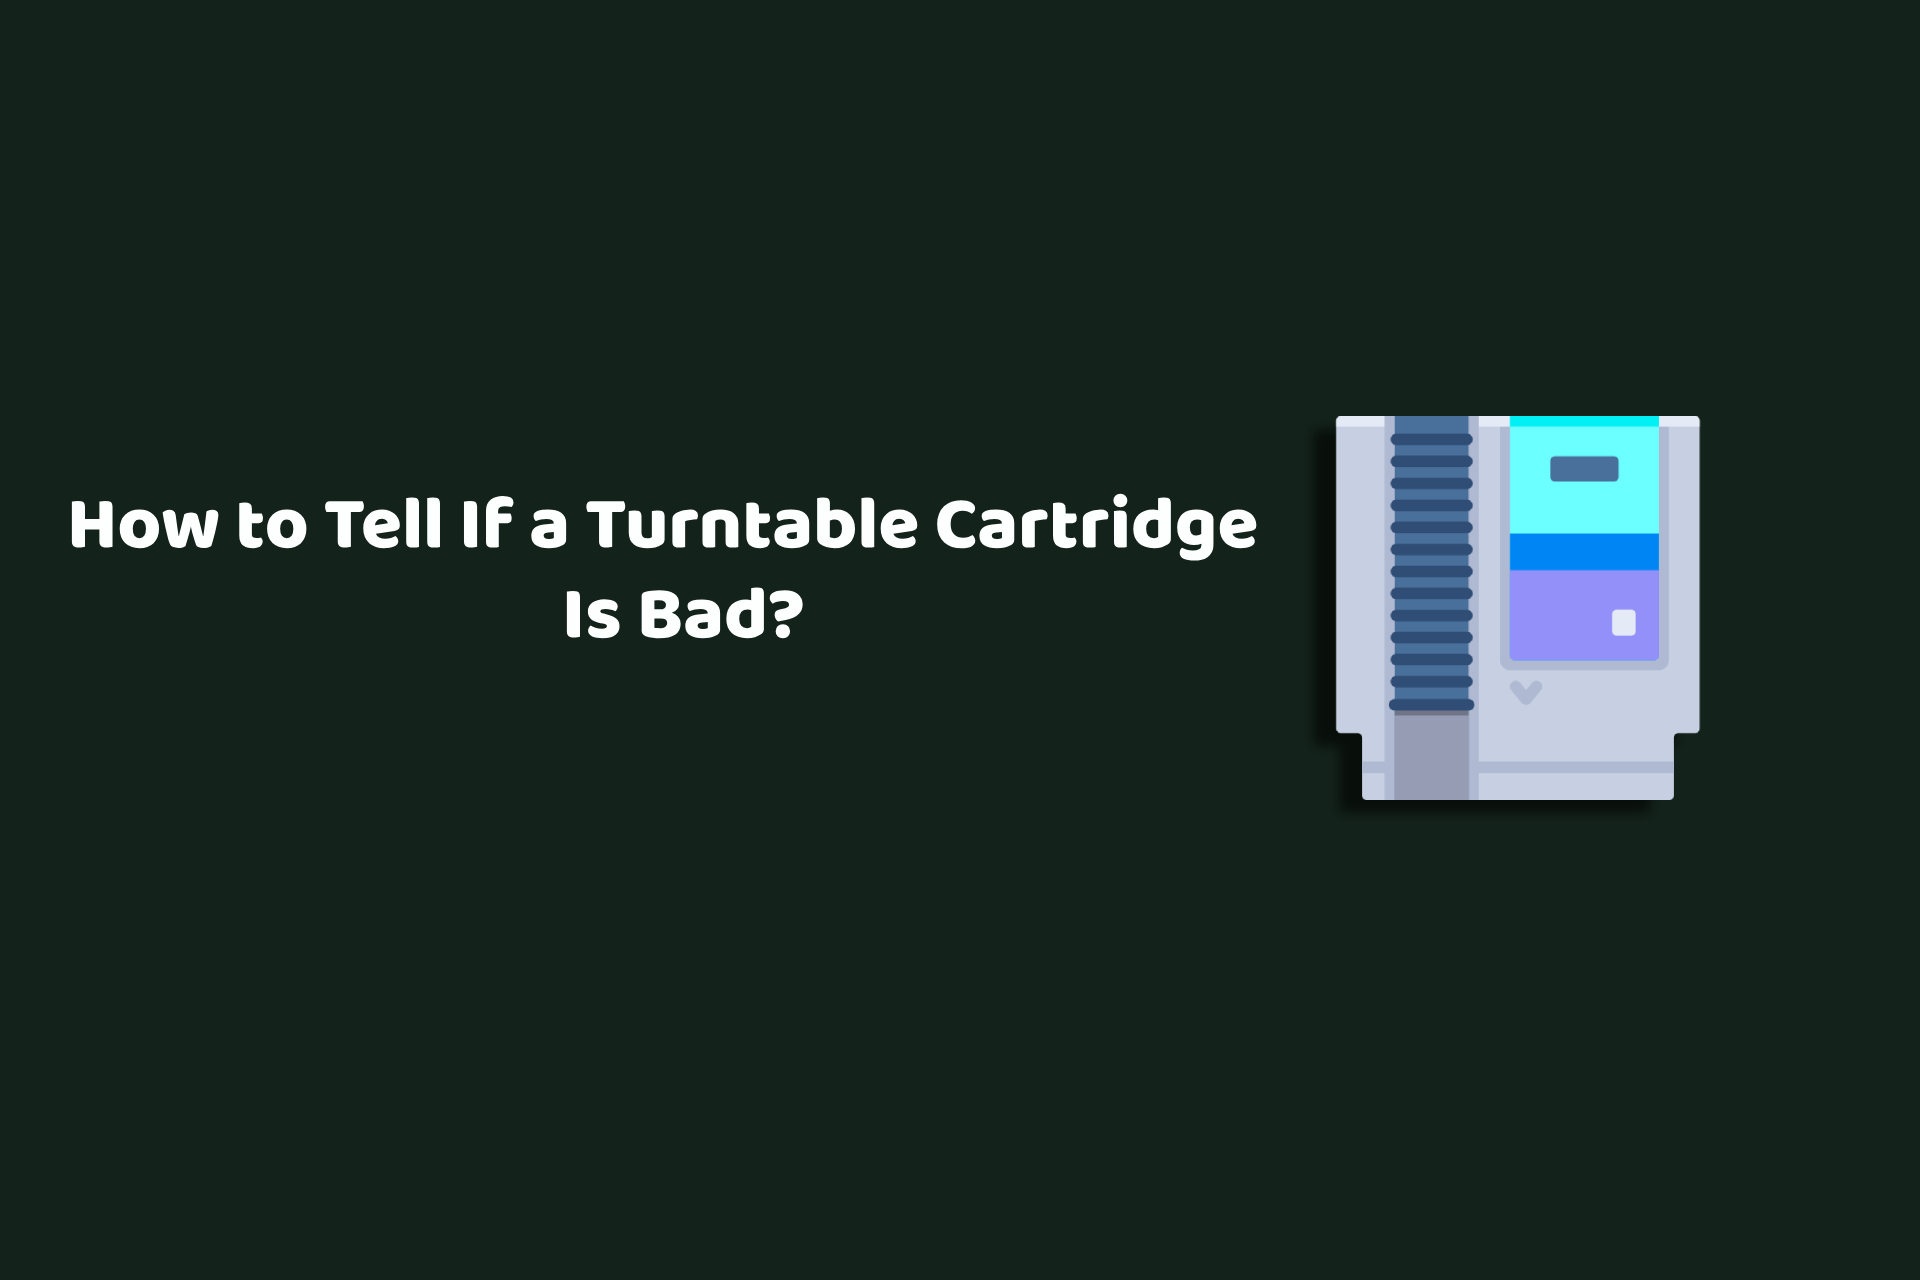
How to Tell If a Turntable Cartridge Is Bad?
The cartridge is the heart of your turntable—it’s what transforms those tiny grooves in your records into the rich, vibrant sounds we all love. Without a properly working cartridge, even the best vinyl can sound distorted or dull. That’s why it’s so important to know when something’s wrong.
But how can you tell if your cartridge is the issue? In this guide, we’ll walk you through the key signs of a failing cartridge and how to fix or replace it, so you can keep your vinyl collection sounding its best.
Let’s dive straight in!
What is a Turntable Cartridge?
The turntable cartridge is the tiny but powerful component that brings your vinyl records to life. It sits at the end of the tonearm, holding the stylus (or needle), and is responsible for converting the vibrations from the record grooves into electrical signals. These signals are then amplified to produce the music you hear. Without it, your turntable wouldn’t be able to do its magic.
Key Components of a Turntable Cartridge
- Stylus (Needle): The point of contact with the record. It traces the grooves to pick up vibrations.
- Cantilever: Connects the stylus to the cartridge body, transmitting the vibrations.
- Magnet and Coils: Work together inside the cartridge body to convert vibrations into electrical signals.
- Cartridge Body: Houses all the components and mounts onto the tonearm.
Every part plays a role in delivering that warm, analog sound we all love. Maintaining the cartridge ensures your records sound their best and last longer.
Common Signs That a Cartridge May Be Bad
Let me walk you through the most common signs to watch out for.
1. Distorted or Muffled Sound
When you feel that your favorite tracks suddenly sound off or maybe the vocals feel fuzzy, or the instruments lack clarity; this could mean your cartridge is failing to pick up the vibrations accurately. A bad stylus or internal damage to the cartridge can distort the signal, leading to muddy playback.
2. Excessive Surface Noise
Vinyl records naturally have some surface noise, but if the crackles, pops, and hisses have suddenly gotten louder, your cartridge could be to blame. This happens when the stylus becomes worn or the cantilever fails to pick up vibrations accurately.
3. Skipping or Jumping Stylus
Does your needle skip tracks or jump across the record? It’s not just annoying—it’s a sign that something’s wrong. While skipping can also result from alignment or anti-skate issues, a worn-out stylus or damaged cantilever can be the root cause.
4. Uneven Sound Between Speakers
If you notice that one speaker sounds louder than the other, this is often due to channel imbalance, which can occur if the cartridge’s internal coils or connections are damaged. It’s a subtle but clear sign of cartridge trouble.
5. Visible Damage to the Cartridge
Sometimes, the problem is right in front of you. A bent stylus, a misaligned cantilever, or cracks in the cartridge body are clear indicators that replacement is needed. Inspect your cartridge under a magnifying glass for any visible wear or damage.
6. Poor Tracking Performance
Tracking is the cartridge’s ability to follow the grooves of the record. If your stylus struggles to stay in the groove, causing mis-tracking or odd sound artifacts, your cartridge could be nearing the end of its life.
7. Cartridge Age and Usage
Cartridges have a finite lifespan. If you’ve been spinning records for years without replacing it, wear and tear could be catching up. Even if the cartridge looks fine, its internal components might degrade over time.
Recognizing these signs early not only preserves your listening experience but also protects your valuable vinyl collection. If you’re noticing one or more of these issues, it might be time to fix or replace your cartridge.
How to Fix or Replace a Faulty Cartridge?
Let me guide you through it step by step to fix or replace your turntable cartridge, so you can bring your turntable back to life and enjoy your vinyl without interruptions:
Step 1: Inspect the Cartridge and Stylus
Before jumping to conclusions, closely examine the cartridge and stylus. Look for obvious signs like a bent stylus, a misaligned cantilever, or any visible damage. Use a magnifying glass for a better view—sometimes, the problem is more apparent than you think.
Pro Tip: Gently clean the stylus with a stylus brush or a cleaning solution to remove dust buildup, which might be causing the issues.
Step 2: Check the Tracking Force
Improper tracking force is a common culprit for playback issues. Use a tracking force gauge to ensure it’s set correctly. Check your turntable or cartridge manual for the recommended settings—this small tweak can sometimes fix the problem.
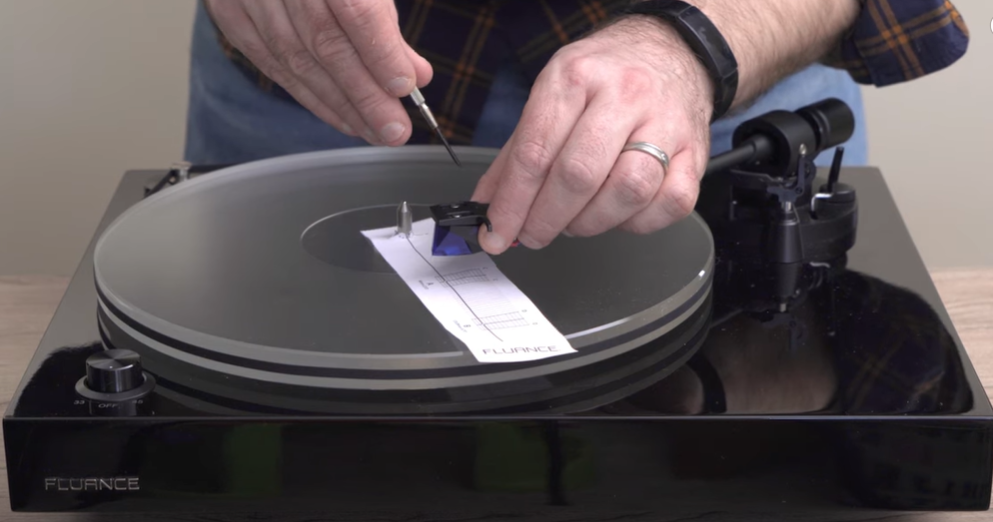
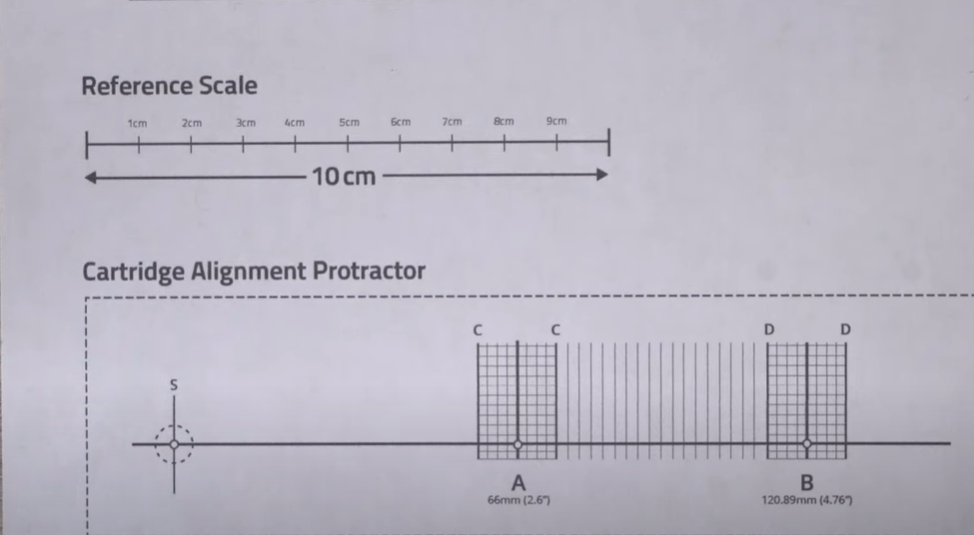
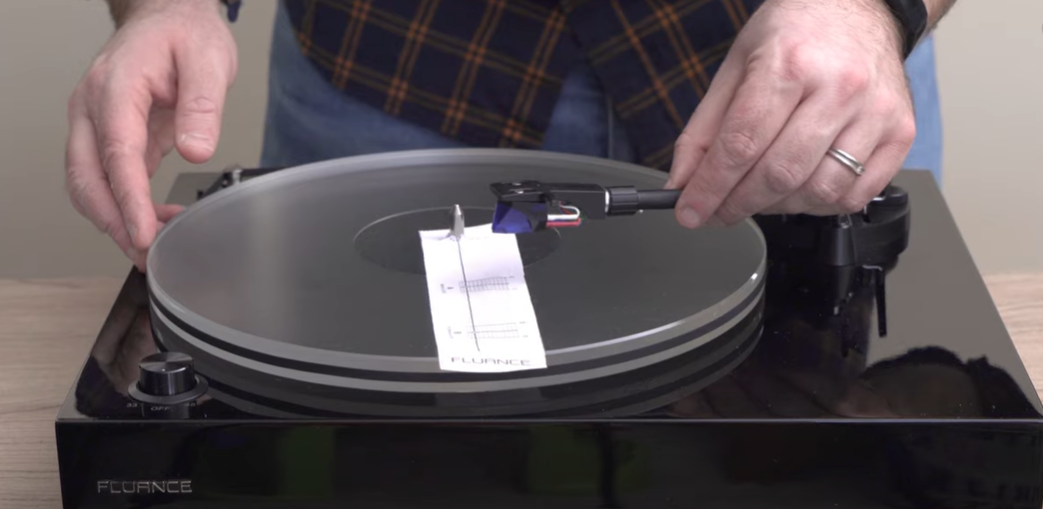
Step 3: Verify Cartridge Alignment
Alignment plays a huge role in how well your cartridge performs. Use a protractor (many are available online for free) to check if your cartridge is perfectly aligned with the grooves. Misalignment can distort sound and even damage records over time.
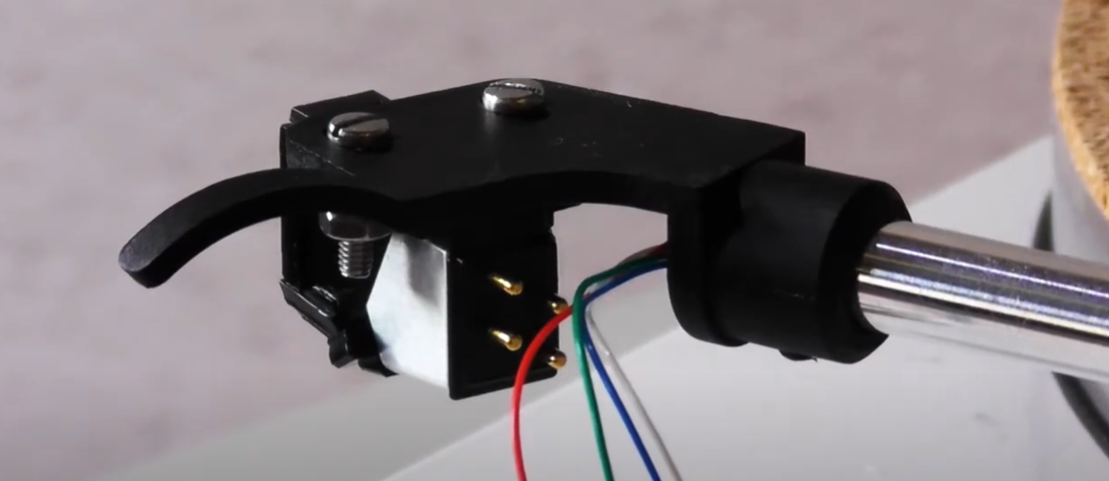
Step 4: Check the Connection Wires
Sometimes, it’s as simple as a loose or corroded wire. Remove the cartridge and inspect the connection wires on the back. Ensure they’re snug and free from corrosion. Use a small amount of contact cleaner if needed. If wires are frayed, consider replacing them.
Step 5: Decide If Replacement Is Necessary
If cleaning, alignment, or adjusting tracking force doesn’t solve the problem, it’s time to consider replacing the cartridge. Look for signs like a worn stylus, uneven channel balance, or visible damage that indicate it’s beyond repair.
Also Read: When to Replace Turntable Stylus?
Step 6: Choose the Right Replacement Cartridge
Not all cartridges are created equal. Find one that matches your turntable’s specifications and your listening preferences. Some popular options include moving magnet (MM) cartridges for affordability and moving coil (MC) cartridges for audiophile-quality sound.
Step 7: Gather the Right Tools
You’ll need:
- A small screwdriver.
- Needle-nose pliers.
- Alignment protractor.
- Tracking force gauge.
Having the right tools ensures a smoother installation process.
Step 8: Remove the Old Cartridge
Unscrew the cartridge from the headshell and gently disconnect the wires. Note the color-coded wires (red, white, green, and blue) and where they connect—this will make installation easier.
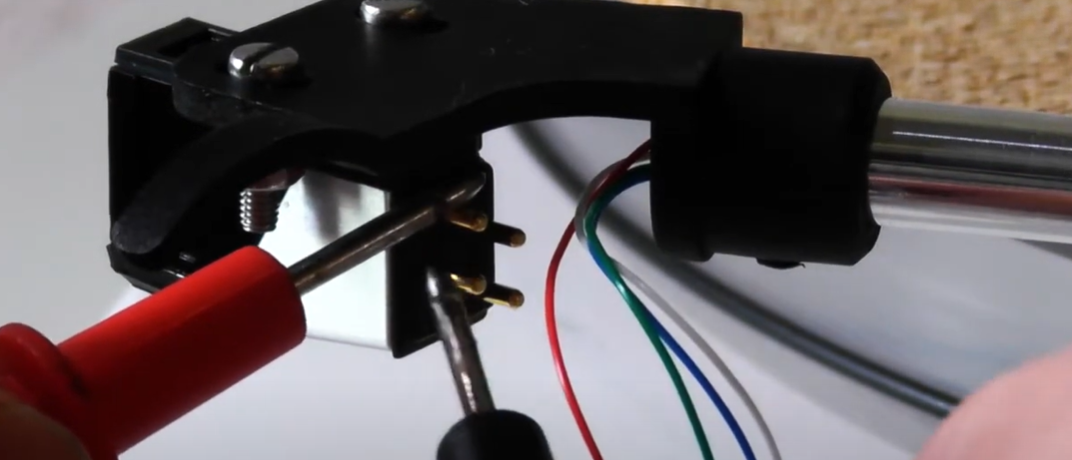
Step 9: Attach the New Cartridge
Carefully connect the wires to the new cartridge. Use needle-nose pliers to avoid bending the pins. Then, screw the cartridge onto the headshell, ensuring it’s secure but not over-tightened.
Pro Tip: Tighten screws evenly to avoid misalignment.
Step 10: Align the Cartridge
Using your alignment protractor, position the cartridge so it lines up perfectly with the turntable’s grooves. This step ensures optimal sound quality and prevents unnecessary record wear.
Step 11: Adjust the Tracking Force and Anti-Skate
Set the tracking force to the cartridge manufacturer’s recommendations using a tracking force gauge. Adjust the anti-skate control to match the tracking force to prevent skipping and ensure even wear.
Play a record and listen carefully. If the sound is clear and balanced, congratulations—you’ve successfully fixed or replaced your cartridge! If issues persist, double-check alignment and tracking settings.
Keep Your Vinyl Spinning Perfectly
Your turntable cartridge is the key to unlocking the true magic of vinyl. Knowing the signs of a failing cartridge and how to fix or replace it can save your records and keep your music sounding incredible.
A little maintenance goes a long way, so don’t wait until the sound deteriorates. Take action, follow the steps, and enjoy your vinyl collection the way it’s meant to be—rich, warm, and flawless. Happy listening!